Download PuTTY
Windows does not include an SSH client by default, so we need to install one. A common one which works well is PuTTY which you can download here.
The executable does not need an installer. Simply place the putty.exe file some place convenient, such as your desktop, once it is finished downloading. If your browser warns you about downloading an executable file, ignore the warning.
Connect using PuTTY
Run the putty.exe program which you downloaded. If you get a warning about running the file, just ignore it.
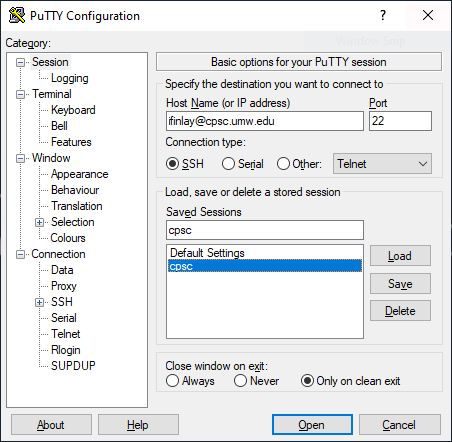
Once you open PuTTY, you can connect with it. Under the textbox that says "Host Name (or IP address)", enter "USERNAME@cpsc.umw.edu", replacing USERNAME with your UMW username. Under the box that says "Port", enter 22. The connection type should be SSH (its default).
I recommend saving the session so that you don't have to retype that each time you connect. Type some name, like "cpsc" into the "Saved Sessions" text box, and click the "Save" button. Next time you login, you can simply double click the session you saved.
Logging In
Enter the password which was sent to you in the CPSC 225 welcome email. Your password will not be shown, not even as little dots or stars. Just type it in and hit enter. If you cannot find your password, please email ifinlay@umw.edu.
You should now see something like the following:
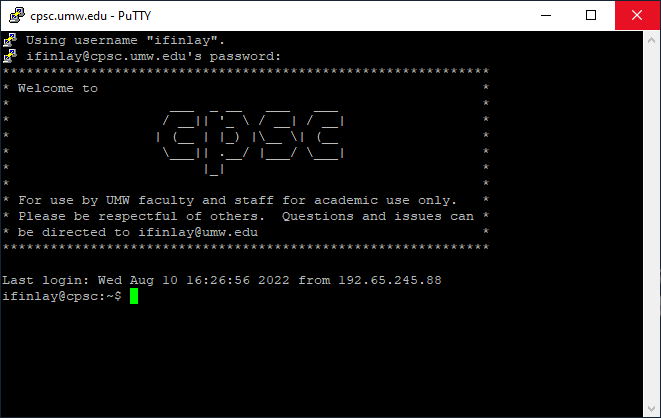
Congratulations, you are logged into cpsc.umw.edu! If you have any trouble with these instructions, please email me.
Change your Password
Once you are logged in, enter the passwd command. This will ask you to enter
your existing password, then choose a new one (and repeat it to confirm). Just like when
logging in, it will not show your password. Choose a secure new password for your account.
ifinlay@cpsc:~$ passwd
Changing password for ifinlay.
Current password:
New password:
Retype new password:
passwd: password updated successfully
To set up authentication using SSH keys instead of a password, follow these instructions:
Download the PuTTY Key Generator
This tool is available on the main PuTTY page. Here is a direct link.
Generate a Key Pair
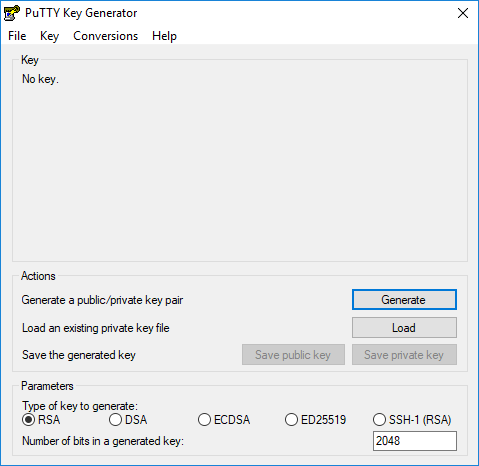
Run the key generator you downloaded above, and run it. Click on the "Generate" button:
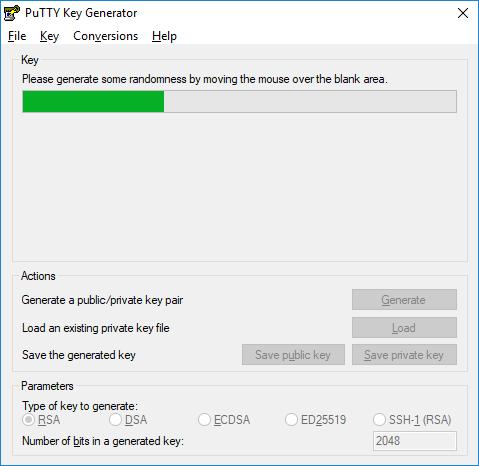
You will be prompted to wiggle your mouse over the blank area. This is used to generate random values for the key. Wiggle it until the progress bar is all the way filled up.
Save the Key Pair
In the text box at the top is your public key which we will paste into the server later. Select all of this text and copy it with Control-C.
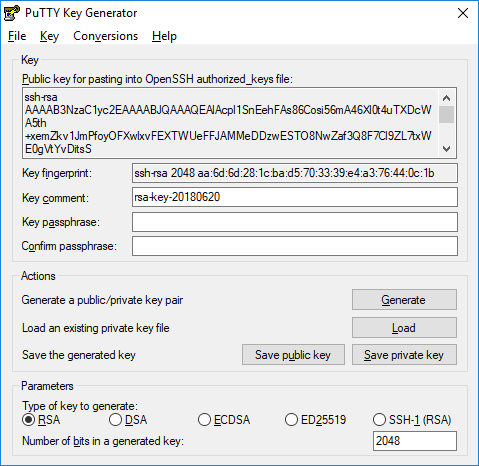
Next click the "Save private key" button and save it as "private.ppk" some place you will be able to find it again.
You can now quit out of the key generator program.
Put the Public Key on the Server
Log on to cpsc.umw.edu machine using PuTTY as described at the top of this page. This will be the last time you need to log in with your password.
Once you're in, run these two commands:
mkdir -p ~/.ssh
nano ~/.ssh/authorized_keys
Then right-click into the window which should paste your public key that you copied in the previous step. If you can't see all of it, that's OK.
Now, hit Control-O to save the file, and hit enter to confirm the file name as .ssh/authorized_keys. Then hit Control-X to quit.
Load the Private Key into PuTTY
Now quit out of PuTTY and open it again. Load your saved session for the CPSC server, then click on the "Connection->SSH->Auth->Credentials" option on the left:
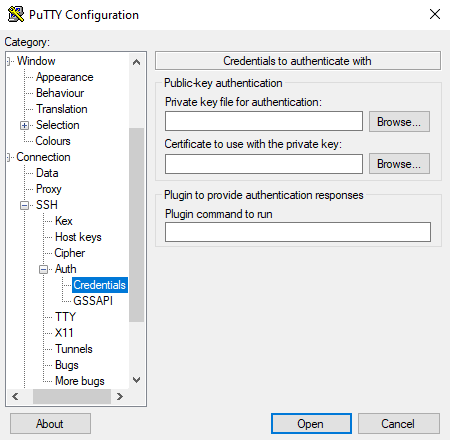
Click the "Browse" button next to the "Private key file for authentication" section, and select the private.ppk file you saved previously.
Click on the "Session" window on the left and save the session again. Then click the "Open" button. If all went well, you should be logged in now, without having to type your password!
If you delete the "private.ppk" file, this will stop working. Be sure that your private.ppk file is never compromised as someone could use it to log in as you. Private keys should only be set up on secure machines.
Copyright © 2024 Ian Finlayson | Licensed under a Attribution-NonCommercial 4.0 International License.